Creating Booklets in Indesign
Make sure facing pages is checked.
Consider the number of pages when deciding what binding method to use
Reader Spreads - this is how it will be when the book is read
When the book is printed the book will need re paginating in order to make
sure the correct pages are on the right sheet of paper when the booklet
its bound together.
To work this out we can draw up a table to get the correct page numbers
Master page - you can add content that you want to appear on every page. This will be based on the master page. e.g slight different heading on every page...
By adding a blue frame to the master page it appears on every page. These objects
will be locked when working outside the master page. This will also lock text boxes but by
pressing (command and shift + clicking the frame) it will unlock the frame allowing you
to add content.
You can create a new master page by selecting the option in the pages palette menu.
From here you can play about with different master pages to help you get
consistency with your work.
In order to get the right page numbering you have to go into the master pages. First of all we need to create a text box, Then following the options above we click on current page number.
This will put all the page numbers on each page that the master page corresponds to .
If you weren't happy with the book starting at page 1, you can alter this in the numbering options
This will help to organise the book how you want it. For instance if there will be blank pages at the
start of the book we would just change the staring page to page 3 for instance.
Printing the Booklet
Check print blank pages - if you don't this might re order the book.
When printing A4 booklet, we need to change the paper size to A3
and Center the page position. Always check the first 3 option panels
General, Setup and Marks & Bleed
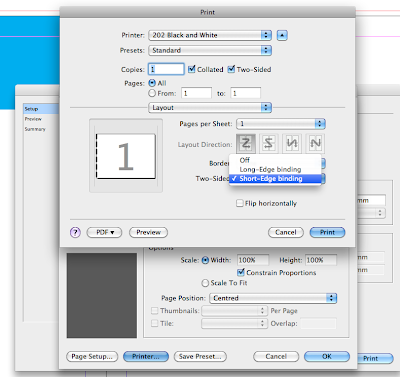
Finally before we print the book, we need to make sure its double sided
we click on the printer button then check the option for double sided print
and also short edge binding. Then we can print from here.
For a larger document we would have to print the booklet out in sections.
with 80 gsm paper you can usually get around 8 pages in a section.
Printing Bigger than A3
In the print options we need to make sure we have the right printer. We need to change
the option to Postscript, this is the printers language.
Using the PPD drop down we need to change it to Adobe PDF 9
this will allow is to increase the page sizes al the way up to A0
change the paper size to A2 so it allows room for the bleed
After setting everything up correctly you can save the postscript file
Once this has been saved we can open up the file in the digital
dungeon to print booklets bigger than A3
If we wanted to open our work on a PC we can convert the postscript file to a PDF using
acrobat distiller. Change the settings to Press Quality then drag the file into the program.
If we want to create separations for screen printing we can do this in the Output menu
in the print settings.
ISSUU
We can turn our PDF's into books online using ISSUU
all we need to do is upload the pdf.
From here we can check all the different information. By obtaining the embedded code
we can insert this into blogger.


No comments:
Post a Comment