Tuesday, 25 October 2011

PROVERBALLY YOURS// MESSAGE & INTERPRETATION

Brief
Produce designs for a set of three high impact posters that deliver a personal identified message derived from your given proverb.

A proverb (from Latin: proverbium) is a simple and concrete saying popularly known and repeated, which expresses a truth, based on common sense or the practical experience of humanity
 
The three posters should work as a set or series and be visually consistent. The first must be produced solely using type, the second solely with image and the third a combination of both type and image.
You are restricted to the use of two colours plus stock.

Background / Considerations


  • Memorable, immediate high impact and clear.
  • Challenging, potentially controversial but appropriate and not offensive.
  • Factual, statistical, informed and specific.
  • You should use the (visual) language appropriate to one of the chosen papers. You can be bold, subtle, humorous, serious, and satirical.
First of all I thought about what could symbolize my proverb. What could represent wrong and right?
 
  • Tick / Cross?
  • Thumbs Up / Thumbs Down?
  • Happy Face / Sad Face?
  • Green / Red? 
  • Right Turn / Wrong Turn?
  • - / +

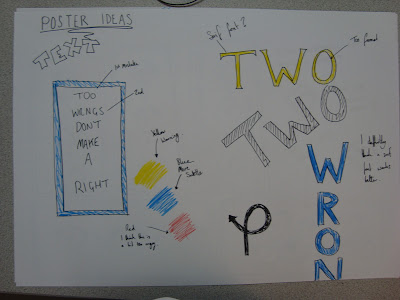
I Tried to come up with a way of representing the wrongs and rights within just text. Here is what I came up with. I made 2 mistakes within each proverb to outline the 2 wrongs. I think this is quite a subtle way of getting the message across.

 
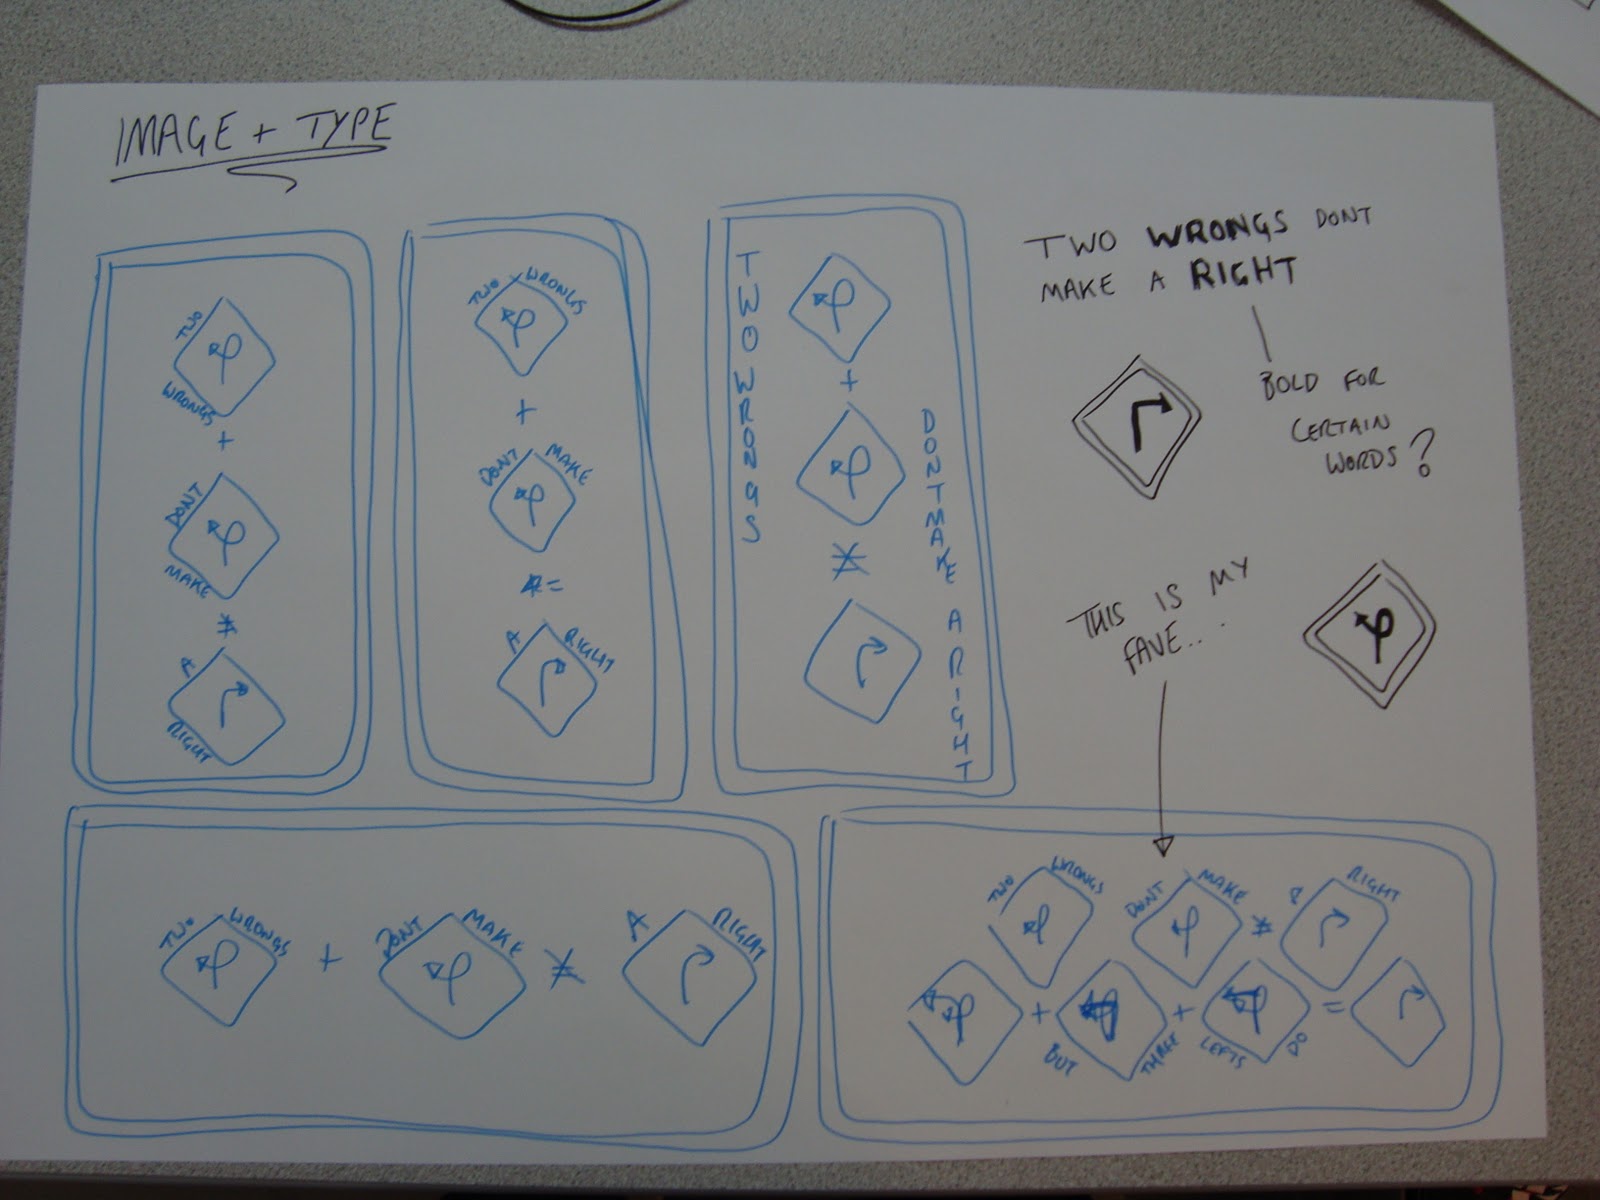
I kind of changed the proverb a bit. I interpreted "2 wrongs don't make a right" as: if someone does something wrong to you doing something wrong to them doesn't make it right. I decided to add but three lefts do,  this was just to give it a bit of humour, the message is still clear but it adds a bit of light heartedness. Also you could interpret the 3 lefts as avoiding doing wrong!

Design Sheets 


INITIAL DIGITAL DESIGNS

I started creating digital versions of my ideas on Illustrator, playing about with type and image, Mainly using the text and pen tool. I found the ideas worked well in colour.


I couldn't decide what colours to go for I like the blue as it is easy on the eyes. I thought I could try represent the 2 wrongs and the right by using the red and green having 2/3 red and 1/3 green, But I think this looks a bit tacky.


I also looked at yellow as a possibility as this is the colour of road signs. I thought this would work well but actually it looks a bit ugly, its also a bit cliche  so I don't think I will be using this.

I tried different spacings of the signs to see what looks good on the page. Here you can see the signs more spaced out. Although it fills the page it doesn't look right.
I added a border to the image.
I positioned the signs closer together. I think this works better.
Added the X to the =
I started to play with type and image here. I added the proverb to either side of the signs. I think this works rather well.

I think I prefer this layout of the text than the other.

Portrait?

I looked at creating my posters in a portrait layout but I dont think it works as well. Except the just Type poster which I think works better in this layout :/


Here are some of my portrait type and image designs, I'm not keen on the colour, I think I prefer the image on the far left the best. The composition works well.


The colour works well on these posters. However the symbols I added look a bit shitty. I'm not too keen on them, but I was just experimenting. I decided to give the posters texture as it gives them a bit of life. The image on the right has a fabric texture over laid on top of the design.


I added a stained texture but this just makes the image look dirty. I much prefer the fabric overlay, it provides better tones and texture.


I think the yellow works allot better with the fabric texture added to it. It takes away that sickly feeling it gave me before. I still think I prefer the blue but it definitely looks allot better now.


I took away the signs leaving the image to see if this would work but it looks terrible I quite like the idea of making some of the words in Bold though for extra impact. I added a Tyre mark as I thought I would keep with the style of road signs. I feel road signs are easy to take on board as they are designed to be glanced at. I tried to keep my designs quite simple so It could be seen in a similar context to the road sign or bill board?


I decided to play around with the type further. I changed the size and the weight of the text to make it more visually interesting and less dull.


I am happy with this design. It looks interesting and is simple at the same time. I think this will work well on a bill board or road sign. This is somewhere everyone would see it.


I really like this design however it doesnt really fit with my landscape posters. I think this works equally as well as the horizontal one. It was a tough decision dropping this from my final 3.
  
FINAL DESIGNS?

Here are my final 3 designs. I am quite happy with the outcome, I think the posters work well as a series, they are easy to understand and are also quite eye catching. I wish I had had more time as I was rather rushed this week so I didn't have allot of time for research. I think the colour works well, I have stuck to the guidelines which is always good.

Type + Image


Image


Type

Wednesday, 19 October 2011

OUGD404 18th October

Freds Session

In this weeks session with Fred we looked at the different typography in Newspapers. As a group we chose a spread from each of the 5 papers. We then counted the different types of fonts that we found based on the font used and the scale. We found some of the papers had a lot more different types than the others depending on how serious or light hearted the paper was. Generally the tabloids had a larger range. Finally I cut out all the different fonts in different sizes that I could find on the spread. Here are my results ordered in size order:

Design Principles Anatomy of Type

Stage 1

I had collected letters previously for my summer brief. I chose 5 upper case letters in different fonts and 5 lower case. I then scanned them in and re-sized them into 5 different sizes: XS = 1cm² S = 3cm² M = 5cm² L = 7cm² XL = 10cm².


Stage 2 

The next step was to dissect my letters and use the parts to create new versions of the letters. I used a scalpel and glue to make new letters.


Stage 3

Once I had made my new letters I traced over them creating a blocked colour version and an outlined one.

Stage 4

Once I had them traced out I scanned them into the computer and re-sized them back into the 5 sizes using Photoshop.


After learning a bit about typeface names I named my new fonts. The S font is called Dissected Block Bold.  The Q font is called Gothic Cutout Bold. The B font is called Mega Tail Serif Bold. The T font is called Roman Slab Bold. Finally the R font is called  Curly Script Regular.

Stage 5
This is the latest thing I have done with my letter forms. I chose my favourite letter and created its font family. Below you can see the image laid out in this formation:

light / light italic
regular / italic
Bold / Bold Italic
Ultra bold Condensed  
I found it was quite difficult to italicize the letter Q as it already has a diagonal, Its only a subtle change, I should of angled it further.

Tuesday, 18 October 2011

ALPHABET SOUP Final Idea

Final Design

Here is my final Design for Sam, I chose to go with the more illustrative typeface. I am quite happy with the outcome, The lettering is very detailed and interesting to look at. I don't think the font says allot about Sam, as the answers I got from the questionnaire didn't really leave me much to play with so my solution to the brief was quite literal to the words I chose.

Here is the name badge I made for Sam. I think the letters work well together. They don't look out of place and all fit in series. The font looks good on a larger scale but I feel when shrunk down all the detail will be lost. This probably wouldn't work as a small font only on a larger scale.

 Here is the full alphabet including 6 glyphs. I based the typeface on Rockwell Bold. I printed out my layout then traced over the top making changes. I incorporated bones into the typeface also which changed the overall shape of the lettering. I am quite happy with the outcome The letters are interesting to look at and have plenty of detail.

There were a few letters that I wasn't too keen on. For instance the Q looks too bold round the edge, It kind of looks out of place , I think this is because the lines a drew were too close together. I'm not too keen on the W either.


 CRIT FEEDBACK

In my crit we stuck our work on the wall next to out partners and assessed each others work in terms of the brief. The feedback from the crit was mainly positive, everybody liked the typeface as a whole and understood the factors I was trying to include. However I found the font did not really represent Sam that well, although he would bring dinosaurs back and likes the idea of time travel it doesn't really say anything about him. I think if i were to do it again I would of looked into Sam's personal life a bit more to work out what he stands for. This has been a good learning experience though and I have learned to look deeper into things and to not always go with the obvious.

Monday, 10 October 2011

Alphabet Soup

Development Work

Here I have created some fonts that relate to Sam, based on existing typefaces. I am quite happy with the outcome. I have tried to Incorporate loyalty, dinosaurs and time travel.

This typeface was based on the font Alba, I'm not that keen on this to be honest, Its a bit too dinosaury for my liking, I was hoping to include other aspects into the design. It still works well but I would prefer to include aspects of loyalty and time travel.
I have based this type on Rockwell, but I think I will use Rockwell bold next time as it will allow more to play with. I really like how this has turned out. It reads well but has detail and aspects of everything i was trying to include. The crowns represent loyalty, the machine like parts represent time travel and finally the bones show the dinosaur concept. I cant decided whether I like this one more than the one below. I will have to experiment to make a decision.


The above type face is based on Stencil, I really like how this has turned out, Its simple but quite stylish. Its quite a subtle change but works well I feel. I like the solid blackness of the lettering. The detailed parts of the letters break the type up a bit which I think gives it a nice contrast.

Sunday, 9 October 2011

ALPHABET SOUP//TYPEFACE//OUGD403

Alphabet Soup Initial Ideas

Using the words I have chosen for Sam I have experimented creating typefaces around existing fonts. I printed out some existing fonts such as Rockwell and Stencil, I changed the opacity so I could work on top of them.


Above are the fonts I created. I'm not a big fan of the first font I tried to include too many aspects into the font which has made the typeface a bit too messy. The 2nd font is based on stencil, I  really like how this font has turned out. Its simple and still has the aspects of dinosaurs and loyalty. The 3rd font is supposed to be in the style of a time machine. I quite like this typeface, the letters are legible and also detailed. I really like the last font. I have tried to incorporate both aspects here. I think it has worked really well, Its quite simple but also interesting to look at. It is legible and meets the brief well I feel.